This article is reprinted with the permission from Foxtrot Games and originally appeared on the Foxtrot Games blog. Randy Hoyt shares his tips on PnPs – let’s all get make some prototypes and share them for play testing with other designers!
—
During the game design and publication process, I have found many cases where I need to send a prototype of a game to someone so they can play it. A print-and-play (“PnP” for short) is a version of a game that can be sent to to someone electronically that that they can print and assemble. I have found PnPs to be immensely useful (for collaborating remotely, for playtesting, and for reviewers), and I now plan out each new project from the beginning with one in mind.
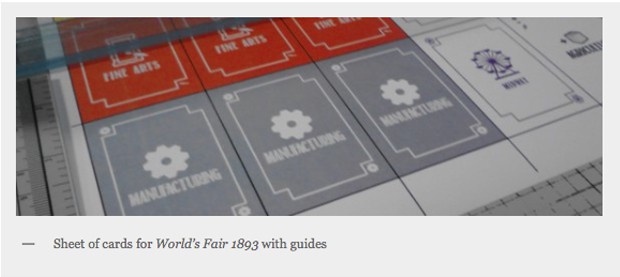
A game designer recently asked about format and other tips for a PnP. I had just finished a major revision to PnP for World’s Fair 1893, and these tips were fresh on my mind:
1. STRAIGHT LINES WITH GUIDES:
Line up your files so that people have to cut in straight lines and in as few cuts as possible. No circles. (Even if your artwork is circle, you can still put them on rectangular tokens.) Give guide lines out to the edge of the file to make it easier to cut with a paper trimmer.
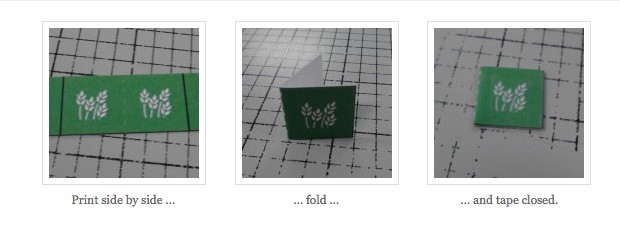
2. DOUBLE-SIDED TOKENS:
Most of the time, components for a PnP can just be printed on one side and have a blank back. With World’s Fair 1893, I found that the game is much less fiddly if the approved exhibit tokens are double-sided. These can be created easily enough by printing the artwork on one side, folding, and taping the token closed. (I used solid lines for cuts and dotted lines for folds.)
3. BORROW COMPONENTS:
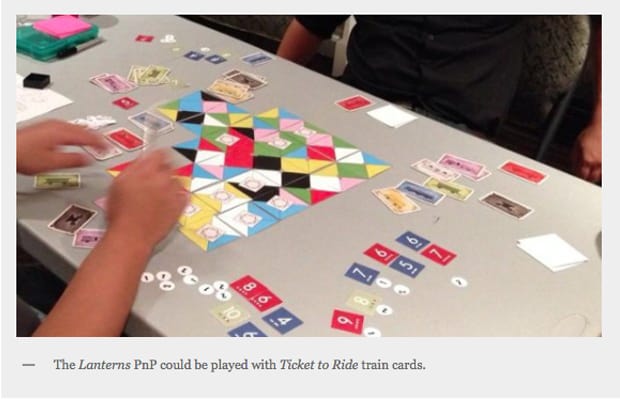
Try to make as many components as possible components that people can borrow from other games. (We intentionally chose colors for our Lanterns: The Harvest Festival PnP so that it could work with Ticket to Ride train cards.)
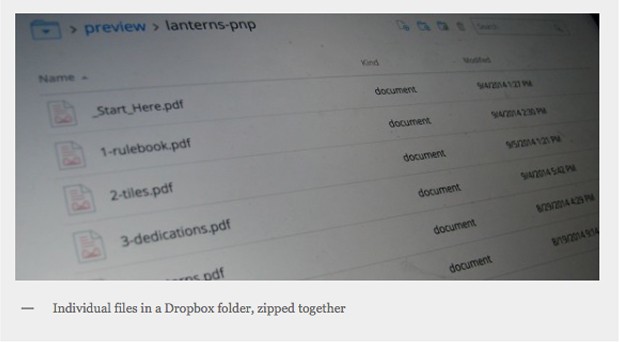
4. ZIP FILE:
I recommend creating multiple files and then packaging them all up into one ZIP file. Whether you upload it to BGG, attach it to an email, or share a link to the file publicly, testers will only have to download one file.
(I use Dropbox to host and backup all my PnP files. I store the individual files in a public folder, and then use my operating system’s “Send To Compressed Folder” feature to generate the ZIP file. Dropbox uploads them automatically, and I send testers a link directly to the ZIP file.)
5. CREATE PDF FILES:
Whatever you use to create your files (Adobe Photoshop, Microsoft Word, etc.), remember that not everyone has access to those proprietary programs. PDF, on the other hand, is an open standard that can be viewed and printed from a wide range of applications.
6. ASSEMBLY INSTRUCTIONS:
Include a file with the PnP that describes the components and provides instructions for how to assemble the components. I create these files in Microsoft Word but export them as PDFs. (I usually name the file _Start_Here.pdf. I put the underscore at the beginning so that it will appear first in an alphabetical list of the files.)
7. SEPARATE MATERIALS:
I recommend putting components that could be printed on different materials in separate PDFs. The three materials I often use for printing PnP files are paper (for cards that I will put in sleeves), thicker card stock (for tiles, tokens, and boards), and sticker paper (for dice stickers).
Here’s a link to the final PnP for Lanterns: The Harvest Festival, if you’d like to see these tips in practice (note the Dropbox link):
Have you found PnPs useful? If so, in what cases? What other tips do you have to add for creating them?