One of the most important parts of your Kickstarter preparation is sending your prototype out for review. A review is one of the best ways for potential backers to know that you have put the time and effort into making a fully finished game. So, here are my top 3 things I remember when I’m sending out review copies (with examples of how we implemented these for Campaign Trail).
1. LOOK FOR REVIEWS NOT PREVIEWS
There are many “reviewers” that will not do a full review of a Kickstarter game. They will just do a “preview”. What is a preview? A preview (to me) is an explanation of the mechanics and a basic overview of the theme. It does not go into what the reviewer found good, what the reviewer found bad, or any recommendations from the reviewer. This does little help for anyone. What backers really want to see is if your game is good. Has it been playtested adequately, were any major errors found during the review? When these questions aren’t answered, it leads to unfinished games being published via funding on Kickstarter, and gives Kickstarter games in general a bad reputation. So, make sure you find reviewers that will give honest, opinionated reviews. Some of my favorites are:
- All Us Geeks
- Undead Viking
- The Meeple Mechanic
- Across the Board Games
- Club Fantasci
- Living the Nerd Life
- The Family Gamers
- themarriedgamers .netThe Married Gamers
2. GET THE PROTOTYPE TO THE REVIEWER IN PLENTY OF TIME
Reviewers need time to learn your game, to schedule plays with your game. Ideally they will run through many plays with various numbers of player counts. If you want a full and honest review (which you do), then you want to provide them with the time to do this. Most likely, a review written after just one play will be worse than a review written after numerous plays and with players more familiar with the game. Given these constraints, it is best to get them a copy of your prototype 6 weeks of when you want the review to be published. Most Kickstarter creators want their reviews to go live on or around launch day of their Kickstarter. So, you need to be thinking about this 3 months out and getting prototypes made to send off to reviewers 6 weeks ahead of time.
3. CREATE THE PROTOTYPE EXACTLY (AS MUCH AS YOU CAN) AS IT WILL BE IN THE FINISHED GAME
Your prototype that you give to reviewers should have as close as you can get to final art and graphic design. Additionally, the components should be what are going to be used in the game. This can be hard at times. With Campaign Trail, we had three different components that just aren’t made by the various prototype production companies like The Gamecrafter and Print and Play Productions. However, we knew it was critical that reviewers experience the game in the same way that our future players would. So we came up with a plan. All of these took advantage of having access to a laser cutter. Thankfully, Bob Schremp at Prawn Designs was able to help us out with this.
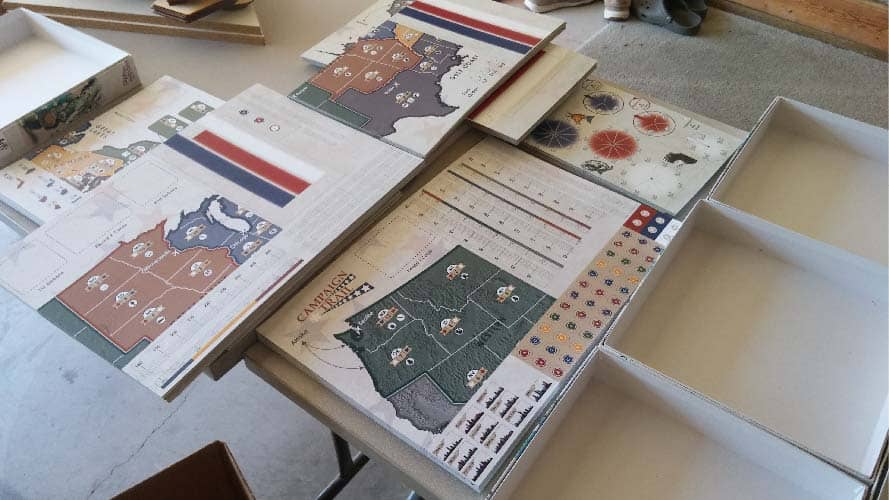
The first component was the 6-fold board. Since, no one makes custom printed 6-fold boards we designed 6 10″x10″ sections, had them printed on large sheets of chipboard, had them laser cut out, and taped them together in manner that would allow them to expand to the full 20″x30″ board size.
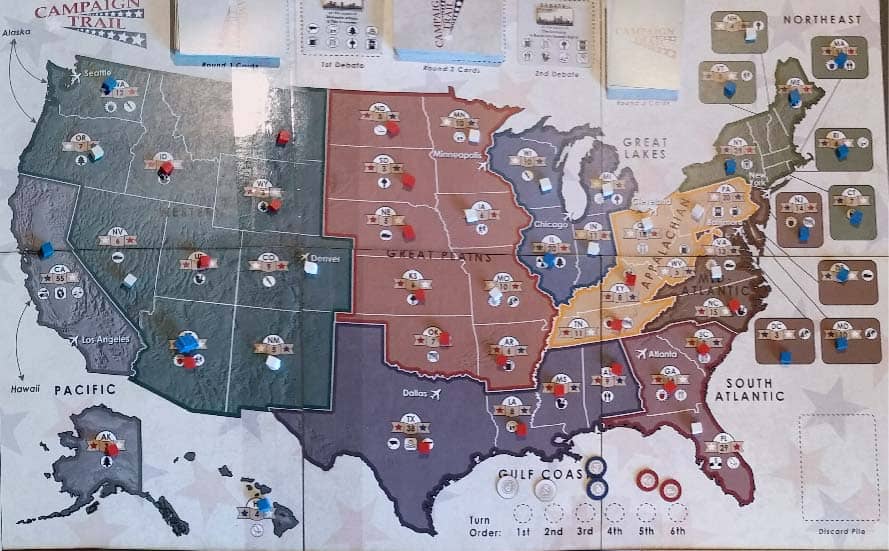
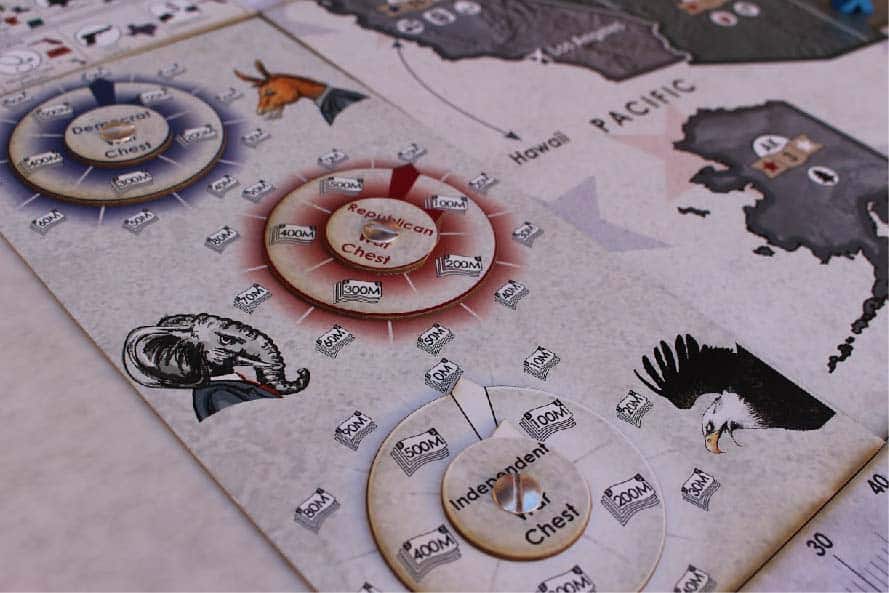
The second component was the war chest dial. This will be a 5″x10″ mat with 3 different rotating dials on it. Again, this is not found at any of the prototype companies so we designed the various pieces, had them printed on chipboard, laser cut them out, and then put them together with binding posts.
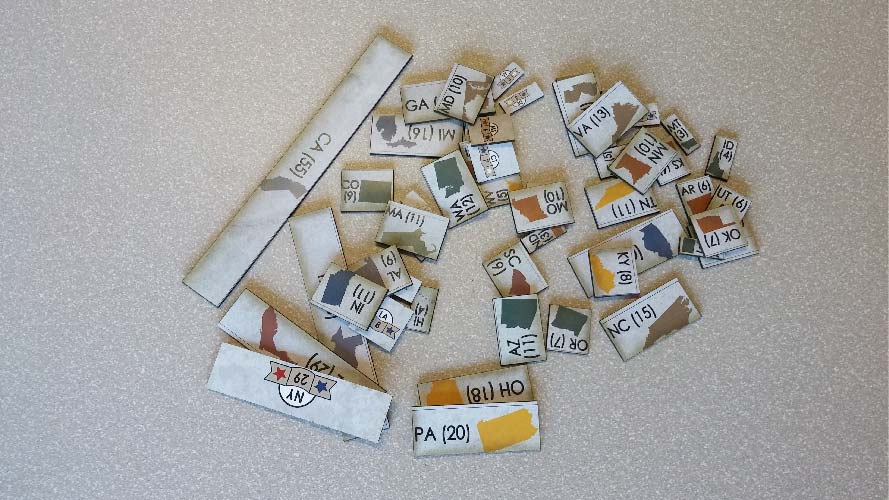
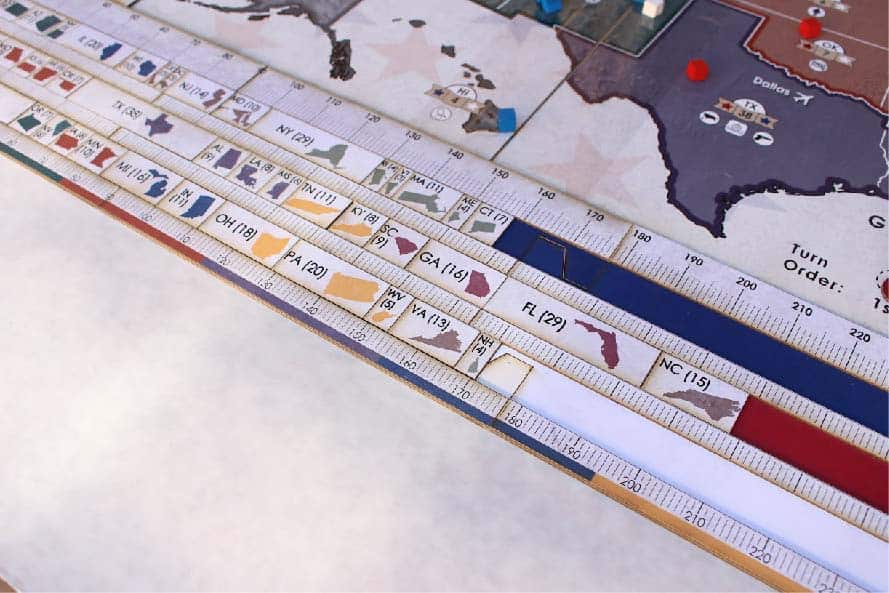
Finally, our electoral vote score track and tokens was a challenge to find. We needed 51 tokens of custom lengths as well as a 4-part track that was 2 layers and also assembled together in a puzzle piece fashion. Again, this wasn’t too bad once we made the design and laser cut the pieces. All we had to do was to glue the layers together.

We are very happy with how our prototypes turned out and are comfortable with the fact that our reviewers will be playing with the exact components that everyone else will get through our Kickstarter campaign. The final ones will just be better quality chipboard.
Here are some more photos of our prototype taken by the League’s Luke Laurie.
[slideshow_deploy id=’12279′]
Let us know, what are your top 3 tips for preparing prototypes for reviewers?